Moving Between Scenes in Unity2D C# Script
Moving between scenes is vital for any good 2D Platform game. The player is certainly going to want a variety of levels to play and you, the developer need to keep your players interested. Today I am going to show you how you can do this using C# language in Unity.
Click to enlarge screenshots
1. First make sure you create two scenes. Name them whatever you like. To keep them organised, I named mine "Level1" & "Level2".
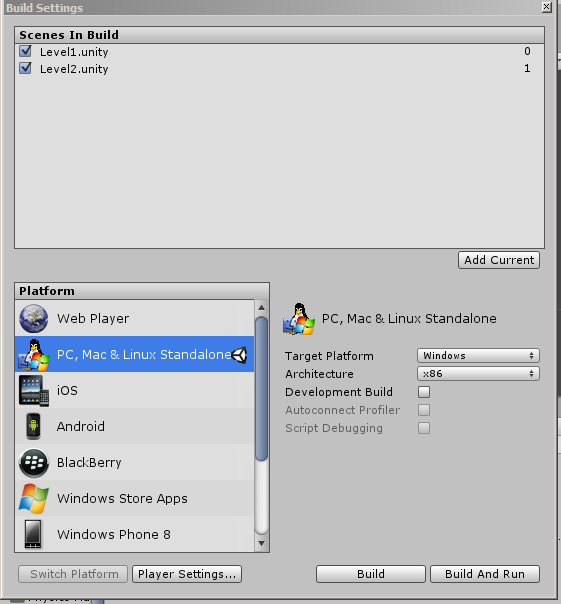 2. Now that you have your scenes created. You need to implement them into your build settings. First go to File, then to build settings. In the image on the left, you can see I have already implemented my scenes in my game. For a fresh game, this should be blank.
The next thing you need to do is to make sure you have your first scene open in Unity. Then select "Add Current".
Now you have to add your second scene. For this, close down your first scene and open your second. Repeat step 2 so you have both of your scenes in the "Scenes In Build" box.
After that's done, click the "X" in the top of the window.
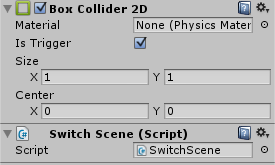 3. Now we need to create an empty game object where you want the scene transition to take place in your game.
 4. Select Add Component in the inspector, select "Physics 2D" and then select Box Collider 2D and set this to a trigger.
5. Now for the fun part. Create a new C# Script and call it "SwitchScene" and input the following code:
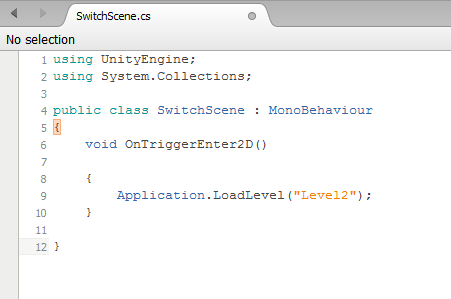
Notice after "Application.LoadLevel", my code says "Level2" input the name of the scene you want to switch to.
6. Add this code to the empty game object we created earlier.
7. Test the scene and enjoy.
C#
,
Game Dev
,
Unity
No comments
Subscribe to:
Post Comments
(
Atom
)
No comments :
Post a Comment